Showing posts with label Tutorial. Show all posts

9.15.2010

It's HERE! Makin' Cute Blogs

 I mentioned earlier that I was working on another blog, well the day has finally come to show it off.  I hope you like it.  It really is mainly geared toward designers, but it is great for the motivated do it yourself designers too!  I have posted a new tutorial over there on how to make your posts expandable.  I also have a new freebie that is available for personal AND commercial use.  Check it out, and drop me a comment on what you think.


Thanks!!


Carolynn

7.09.2010

Where is Minima?

So I panicked slightly when blogger started making all their changes. It at first appeared to me that with the new version of blogger that Minima was no longer available as an option for a template. This really bugged me, because there are so many great tutorials out there that use minima to alter the look of your blog. Anyway, for those of you who worried like, me.... I found it. All of the old templates are located on your "Edit HTML" page, at the very bottom.


Carolynn

4.28.2010

Tutorial: How to post your images in Blogspot Larger than the Default

I made this tutorial, because I really liked being able to changed the size of your image with out having to upload it to Photobucket or some other Picture hosting site. This makes it easy to change the size of your images right in blogger!

This tutorial is so great for photography blogs and just for anytime that you really want your pictures to stand out.

Tutorial: How to post your images in Blogspot Larger than the Default


Carolynn

9.21.2009

Tutorial on How to Add a Super Cute Header to Your Blog!

I decided that I needed to figure out a way for EVERYONE to have a Super Cute Header, even if you don't know how to make one yourself. So I am now going to start designing cute Headers and they will be available FREE on my Blog Accessories Page. It is soooo simple!


Step #1:
Go to the Blog Accessories Page and pick out a header and copy the text in the box below it, or if you have one of your own that is great too!

Step #2: Go to Layout, and Page Elements, and Click on Edit (next to Header).


Step #3: Paste the text that you copied from step #1 in the "From the web" spot, and make sure that you have selected "Behind Title and Description". Then Click Save.


Step #4: Then you will notice that Your Title is not centered in the image, it is on the top. To fix this, we are going to go to the "Edit HTML" Page. (When you are finished with this tutorial Click Here to learn how to get rid of the border around your header)


Scroll Down until you see #header h1 { and change the 15px to 130px. Then Click Save Template. (Note, you do not have to change it to 130 exactly, that is just the best number for centering your text on my Headers, if you have a header that is sized differently, you will have to play with different numbers until you find one that centers it well.)

And that's It! You have a beautiful header! Just another way to Makeover your Blog!

Photobucket

9.01.2009

Tutorial on How to Add a Custom Signature to Your Blog!

A Signature is a fun way to customize your blog and it is easier than you think!
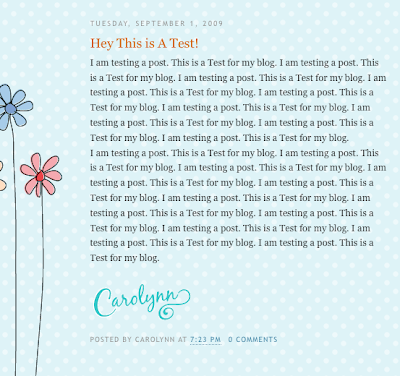

Step #1:
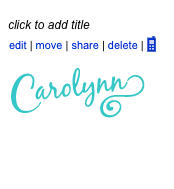
You need to create your custom signature in the program of your choice, I use Adobe Illustrator or Adobe Photoshop. Make sure that when you save your signature, you save it as a png file with a transparent background. If this is a step that you can't do yourself, or don't want to do yourself, email me (carolynn@dforte.com), and I can design you a custom signature for your blog for only $10!

Step #2:
Create a Photobucket Account (www.photobucket.com)
Step #3:
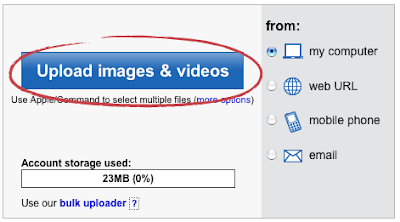
Upload your Custom Signature.

Step #4:
Click on your signature.
Step #5:
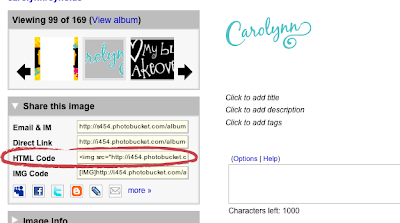
A similar screen below should show up. Copy the HTML Code for your signature.
Step #6:
Return to your Blog and go to your Settings and Formatting Section.
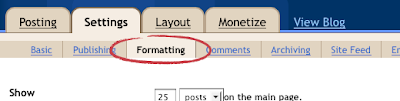
Step #7:
Scroll to the bottom and you will see a Post Template section, in the box, paste the code that you got from photobucket. Then Save.
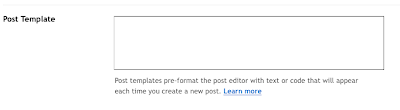
Step #8:
Go to Layout and Edit HTML.
Step #9:
Scroll down to where you see the below text, and change the border to 0px. Then Save your template.
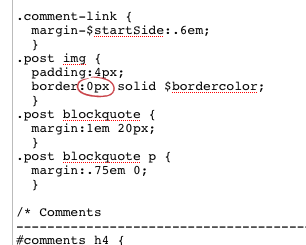

And you are done!


Photobucket

Tutorial on How to Add a Cute Blog Background to your Blog!

My Backgrounds work with most Blogger templates, but they ALL work well with the Minima Template.

Step #1:
Find your cute background Here! Select ALL of the text in the box below the background you want.

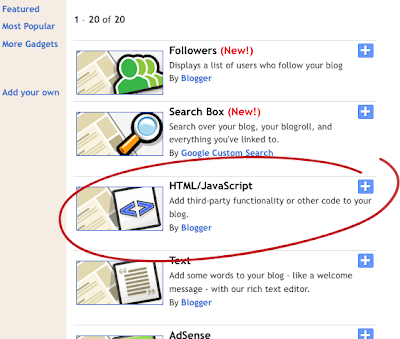
Step #2: Go to you Layout tab and Page Elements screen (below) and click on Add a Gadget (circled).


Step #3: Find HTML/Javascript and Click on it.


Step #4: Paste the code that you copied from Step #1 in the content box, like you see below (you do not need a title). Then Click Save.

And Voila!! You have a Way Cute Background!


Photobucket

8.22.2009

Tutorial on How to Add a Post Divider to Your Blog!

Adding a Post Divider adds a fun touch to your blog and is way easier than you would think!


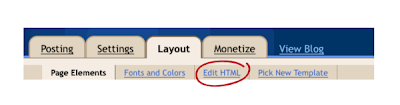
Step 1: Go to your Layout tab of your blog and click on Edit HTML.
Step 2: Scroll down until you get to the Posts section.

Step 3: Replace the above, circled text with the text located below the post divider of your choice. (Find post dividers HERE)


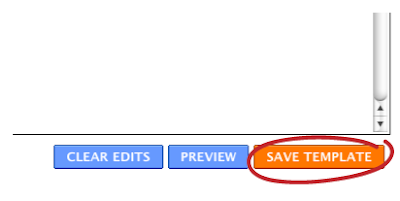
Step 4: Click on Save Template, and you are done!!

Photobucket

7.16.2009

Tutorial on How to Get Rid of Line/Border Around Blog Header

Ever wanted to get rid of that annoying border around your Header on you Blog? It is super easy!


Step #1: Go to your Layout Page and Select "Edit HTML"

Step#2: Find the following Code and change the border from 1px to 0px. Make sure that you do it in both places.
This is what it should look like when you are done:

Step #3: Click Save Template

And........It's Finished! No Border!

Photobucket