A Signature is a fun way to customize your blog and it is easier than you think!
 Step #1:
You need to create your custom signature in the program of your choice, I use Adobe Illustrator or Adobe Photoshop. Make sure that when you save your signature, you save it as a
png file with a transparent background. If this is a step that you can't do yourself, or don't want to do yourself, email me (carolynn@dforte.com), and I can design you a custom signature for your blog for only $10!
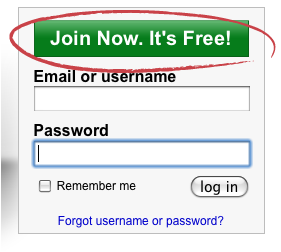
 Step #2:
Create a
Photobucket Account (www.photobucket.com)
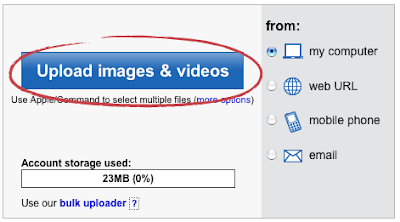
 Step #3:
Upload your Custom Signature.
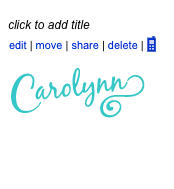
 Step #4:
Click on your signature.
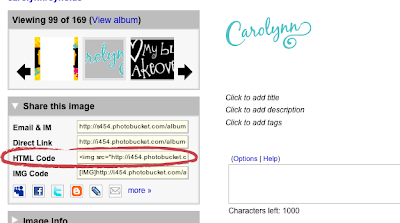
 Step #5:
A similar screen below should show up. Copy the
HTML Code for your signature.
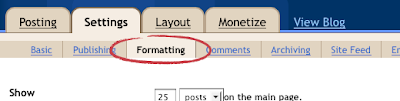
 Step #6:
Return to your Blog and go to your
Settings and
Formatting Section.
 Step #7:
Scroll to the bottom and you will see a
Post Template section, in the box, paste the code that you got from photobucket. Then Save.
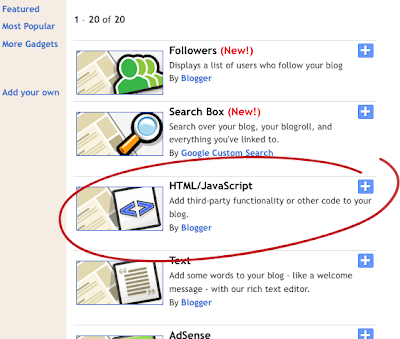
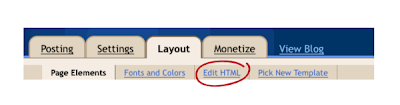
 Step #8:
Go to
Layout and
Edit HTML.
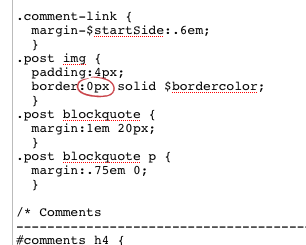
 Step #9:
Scroll down to where you see the below text, and change the border to
0px. Then Save your template.

And you are done!